In office printing, maintaining peak efficiency and print quality entails not only timely toner replacement but also the proper management of waste toner. Kyocera TASKalfa 4052ci, 5052ci, and 6052ci machines are renowned for their reliability and productivity. In this comprehensive guide, we’ll delve into the intricacies of changing waste toner on Kyocera TASkalfa 4052ci/5052ci/6052ci, ensuring smooth operations and pristine print outputs.
Waste Toner on Kyocera TASKalfa xx52ci Series
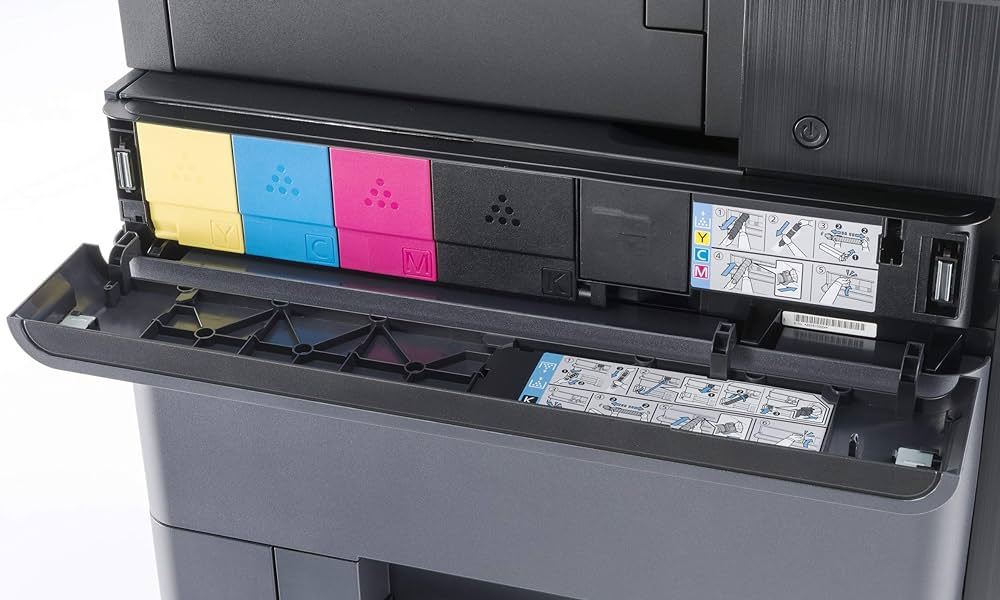
For the Kyocera TASKalfa xx52ci Series, Kyocera has introduced a significant improvement regarding the waste toner bottle. The empty black toner bottle now serves as the new waste toner container. This innovative design overhaul aims to enhance efficiency while reducing unnecessary waste.
With this change, there’s no longer a need to store a separate bottle onsite solely for waste toner disposal. This is why we highly recommend changing the waste toner bottle every time the black toner runs empty, ensuring seamless operation and minimal environmental impact.
Step-by-Step Guide to Changing Waste Toner
Step 1 – Accessing the Printer’s Maintenance Menu
Begin by accessing the maintenance menu on your Kyocera TASKalfa printer. This is typically done through the control panel interface, where you’ll navigate to the maintenance settings.
Step 2 – Locating the Waste Toner Container
Within the maintenance menu, look for the option related to waste toner management or replacement. This should lead you to the section where you can access and replace the waste toner container.
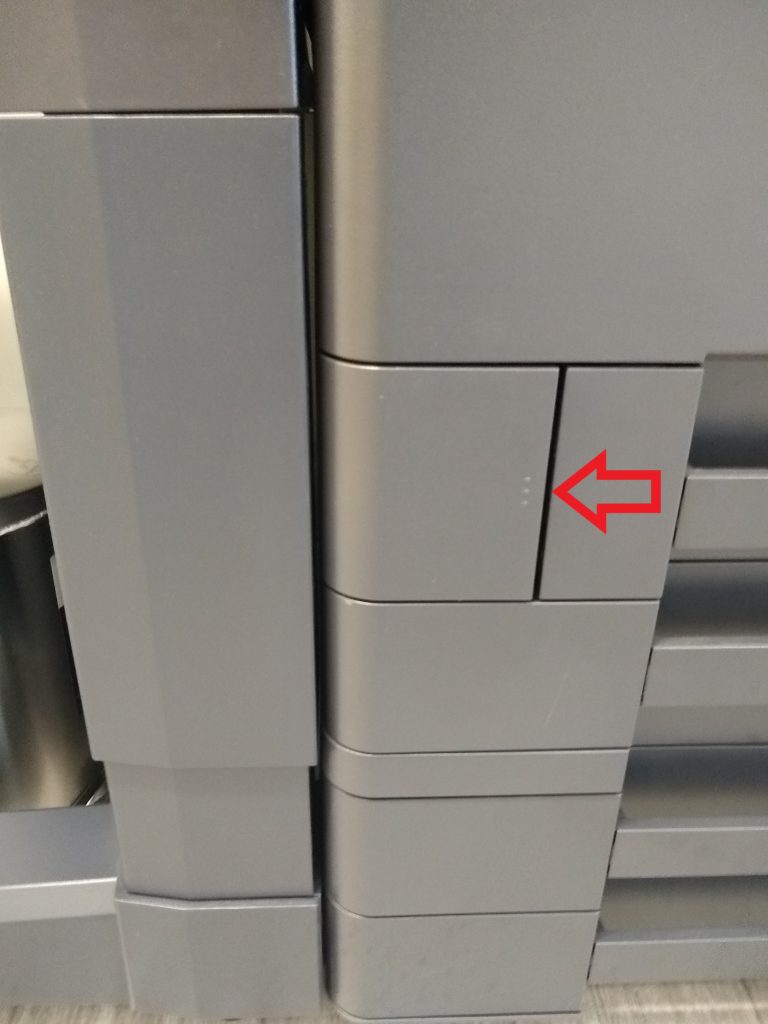
Step 3 – Removing the Old Waste Toner Container
Carefully open the printer’s access panel or compartment housing the waste toner container. Remove the old container by gently pulling it out of its slot, taking care to avoid spillage or contamination.
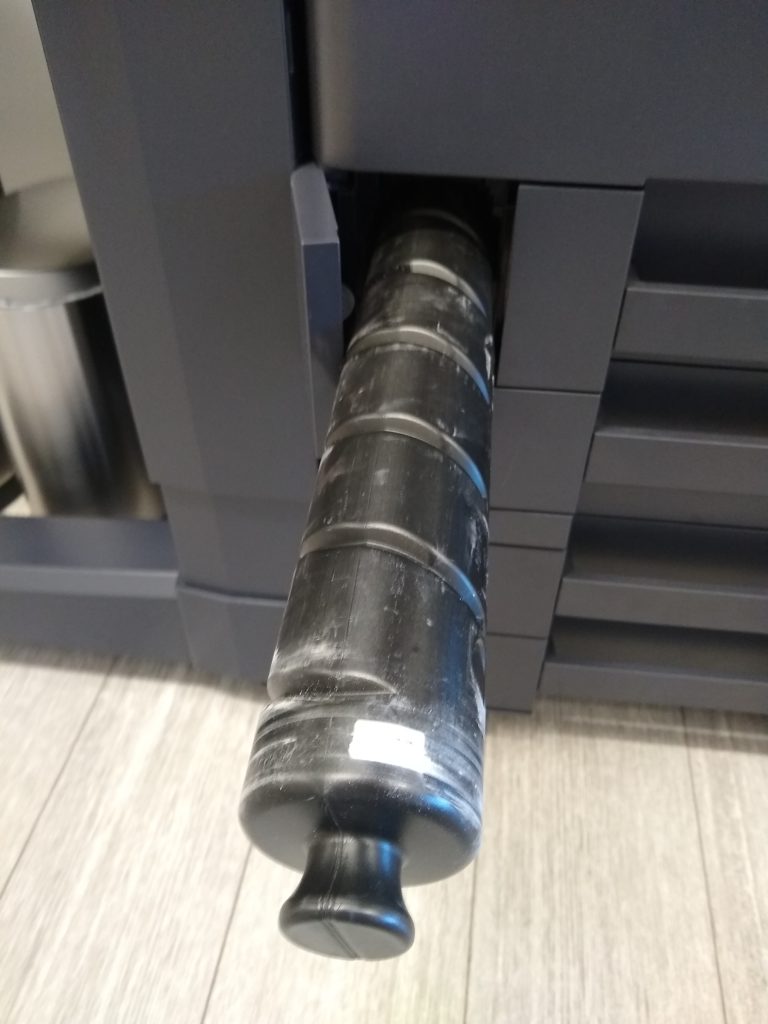
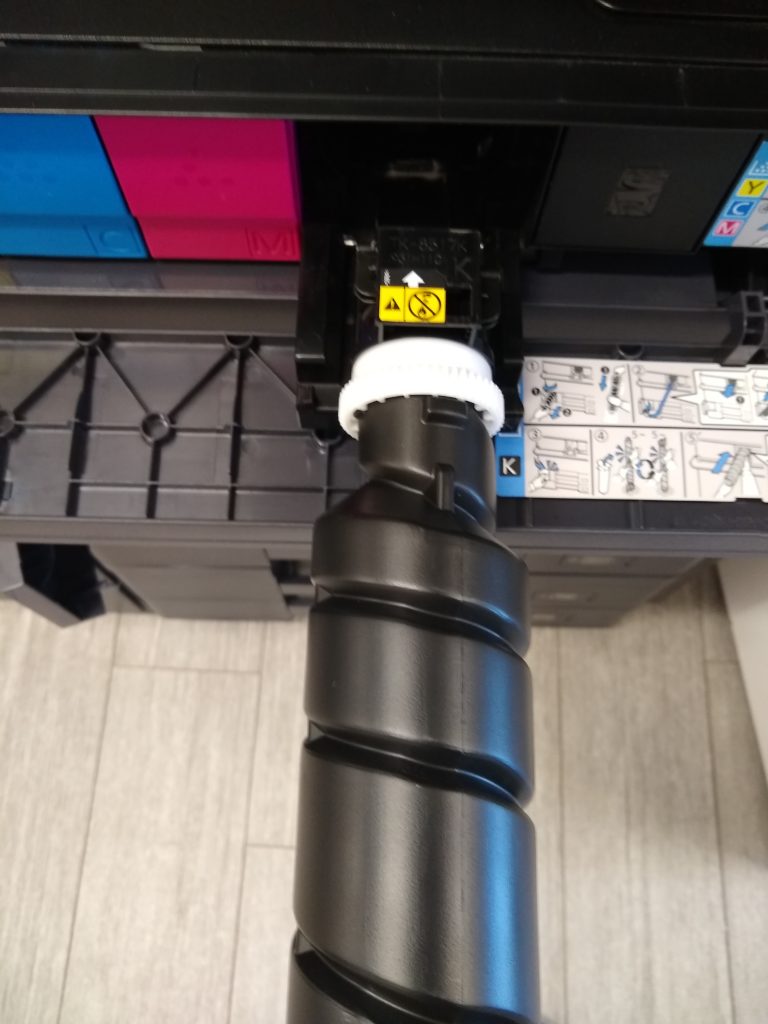
Step 4 – Preparing the New Waste Toner Container
Before inserting the new waste toner container, ensure it is compatible with your printer model and has been properly sealed to prevent leakage. Shake the container gently to evenly distribute the toner particles.
Step 5 – Inserting the New Waste Toner Container
Slide the new waste toner container into the designated slot within the printer, ensuring it is securely in place. Double-check that it is inserted in the correct orientation to prevent any potential leaks or malfunctions.
Step 6 – Closing the Access Panel
Once the new waste toner container is installed, securely close the access panel or compartment. Ensure that it is tightly sealed to maintain optimal printing conditions and prevent any toner spillage.
Additional Tips and Considerations
Dispose of Waste Toner Responsibly
Proper disposal of waste toner is essential to minimize environmental impact. Follow local regulations and guidelines for recycling or disposing of waste toner containers.
Regular Maintenance
Incorporate waste toner replacement into your regular printer maintenance schedule to prevent toner buildup and ensure consistent print quality.
Use Genuine Kyocera Replacement Parts
For optimal performance and reliability, always use genuine Kyocera replacement waste toner containers specifically designed for your printer model.
Conclusion
By following the step-by-step guide outlined in this article and adhering to best practices for waste toner management, you can ensure smooth operations and pristine print outputs. With proper maintenance and attention to detail, your Kyocera TASKalfa will continue to deliver exceptional results for years to come.
Image Source:
Boston Document System