Managing printing activities within a business can be a challenging task, especially when it comes to monitoring usage and controlling costs. The Kyocera copiers offer a solution for this issue through the use of Job Account Codes. These codes allow businesses to assign and track print, copy, and scan activities by user or department. This ensures efficient resource allocation and cost management.
In this article, we’ll guide you on how to create Job Account Codes on Kyocera TASKalfa series devices.
Step 1: Access Kyocera Customer Center RX on Web
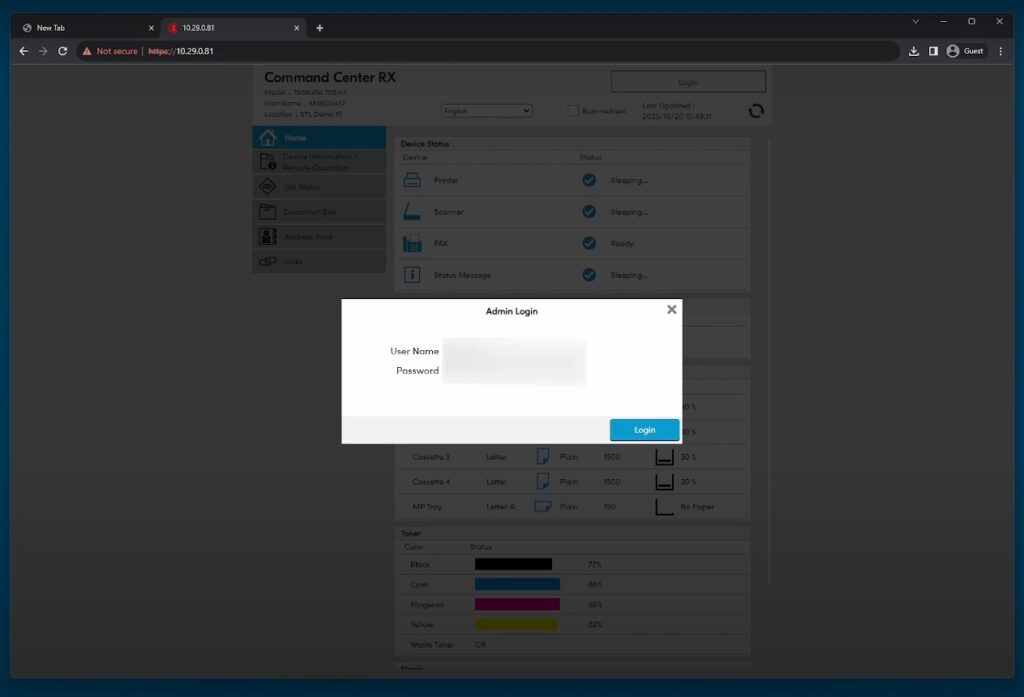
To create Job Account Codes, you need to access the Kyocera TASKalfa device’s web interface called Customer Center RX. This is where you can edit all the configurations for your Kyocera device.
- Obtain the IP Address: First, find the device’s IP address by printing a status page from the copier. This can usually be done by navigating to the system menu on the device’s control panel and selecting “Print Report” or “Print Status Page.”
- Open a Web Browser: On your computer, open a web browser and type the device’s IP address into the address bar. Press Enter. This will take you to the device’s web interface login page to Command Center RX.
- Login as an Administrator: Log in using the default credentials, which are usually “Admin” for both the username and password. If these have been updated, enter your new credentials. For our customers, feel free to call us at 702-979-5002 for assistance with your login details. Please avoid changing the password; if it’s changed and forgotten, a password reset fee will apply.
Step 2: Navigate to the Job Accounting Settings
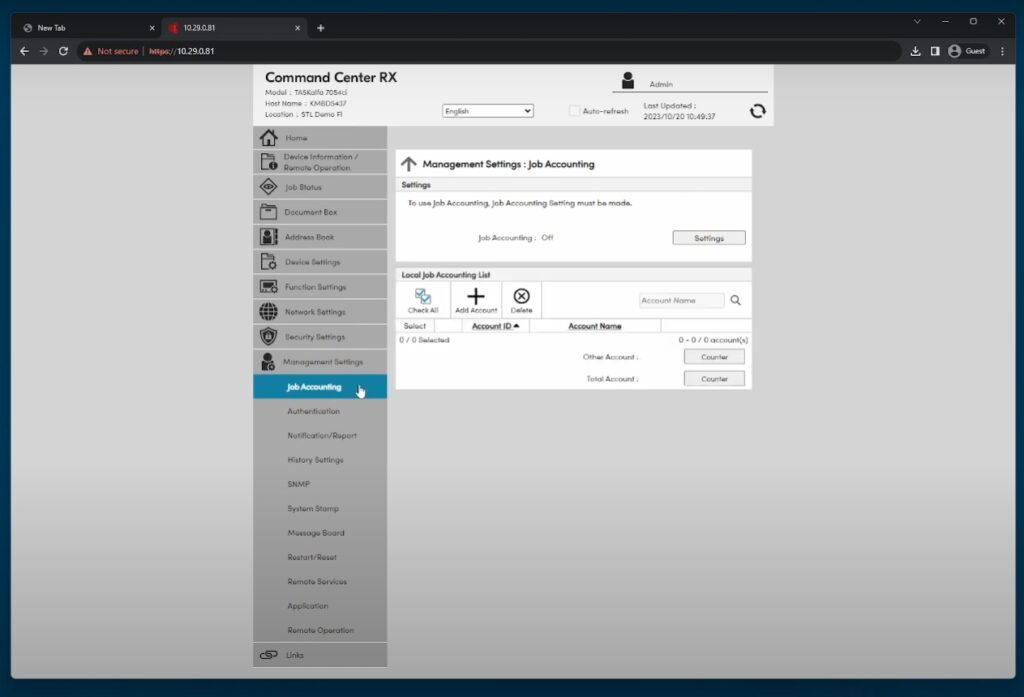
Once you’re logged into the web interface, the next step is to navigate to the Job Accounting settings where you can create and manage Job Account Codes.
- Go to System Settings: On the main menu of the web interface, select “System” or “Management Settings” depending on your model.
- Access Job Accounting: Within the System settings, find and select “Job Accounting.” This section is where you can create, edit, or delete Job Account Codes.
Step 3: Create a New Job Account Code
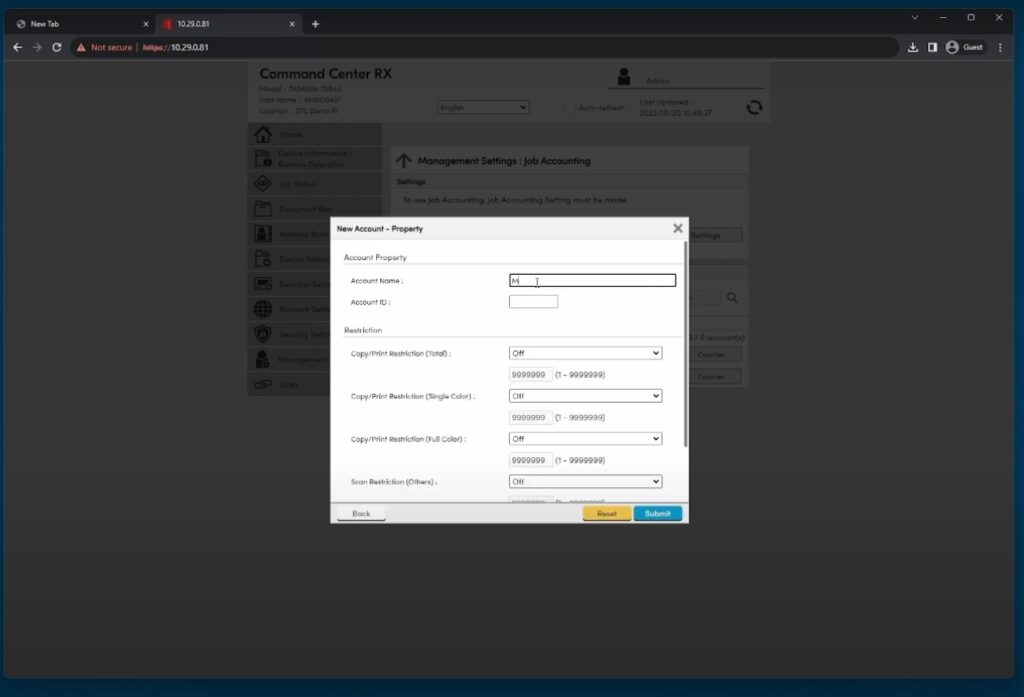
Now that you’re in the Job Accounting section, you can create a new Job Account Code.
- Add New Code: Look for an option such as “Add” or “New” to create a new Job Account. Click this option to begin the process.
- Enter Account Details: You’ll need to fill in details for the new account:
- Account Name: Assign a name that clearly identifies the user or department.
- Account ID: Choose a unique ID or code for the account. This could be a number or a combination of letters and numbers.
- Limitations: Set any limitations or restrictions on print, copy, or scan usage. This is optional but useful for managing resource allocation.
- Save the Account: After entering all the necessary details, click “Save” or “Submit” to create the account. The new Job Account Code will now be active and can be used by the assigned user or department.
Step 4: Assign Users to Job Account Codes
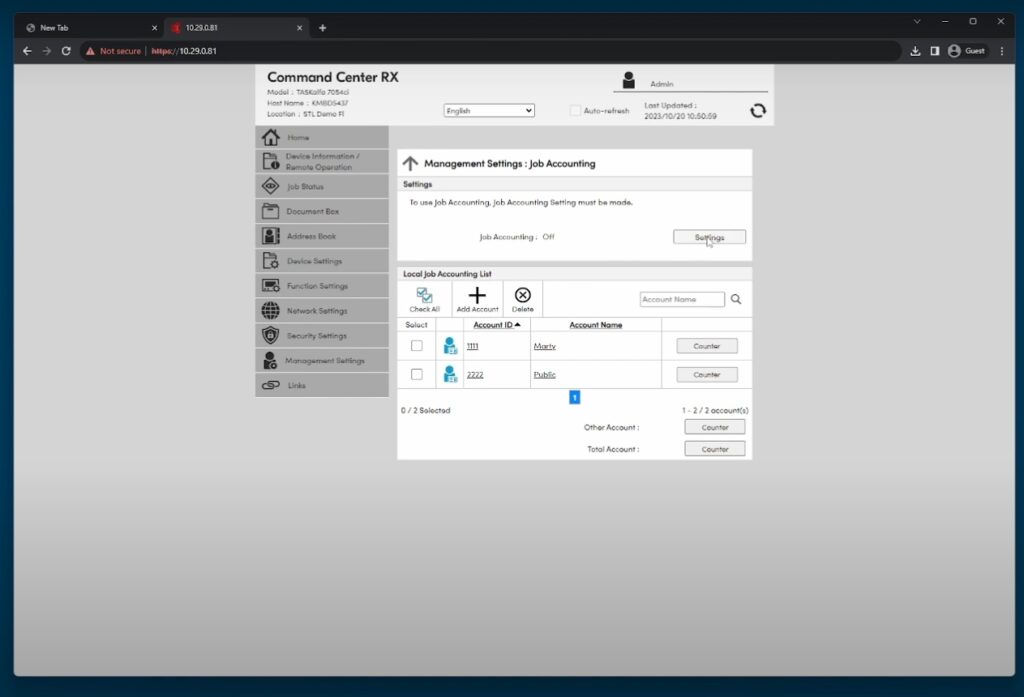
To effectively use the Job Account Codes, you’ll need to assign users or devices to these codes.
- User Assignment: Go to the user management section in the web interface, and assign the created Job Account Codes to the respective users or departments.
- Device Assignment: If your organization uses multiple Kyocera copiers, make sure to configure the Job Account Codes across all devices.
Step 5: Monitoring and Reporting
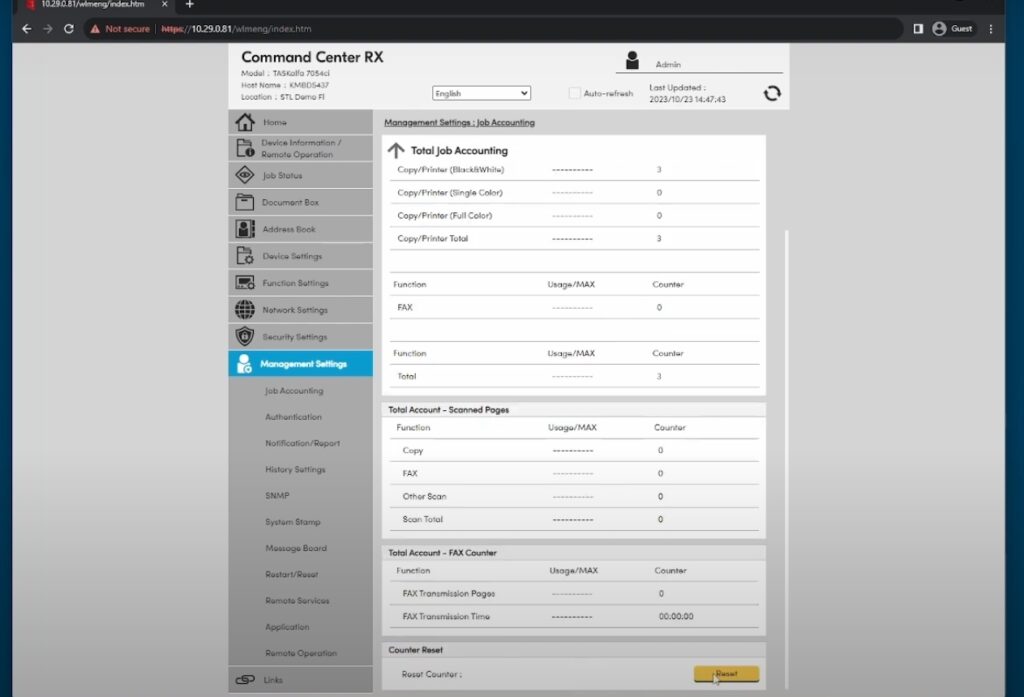
Once the Job Account Codes are set up and in use, you can monitor usage and generate reports.
- Access Reports: In the Job Accounting section, you’ll find options for generating reports. These reports can show usage per account, helping you analyze and control printing costs.
- Adjust Settings: Based on the reports, you may want to adjust the limitations or create additional Job Account Codes to better manage resources.
Conclusion
Creating Job Account Codes on Kyocera TASKalfa series devices is a straightforward process that offers significant benefits for managing printing activities. By following the steps outlined in this guide, you can efficiently set up these codes to monitor and control usage, ultimately leading to better resource management and cost savings for your organization.
You can also check these two articles related to setting up your Kyocera’s Job Accounting feature:

