
Enabling Job Accounting on a Kyocera copier lets you efficiently track and manage print jobs by assigning account codes to users or departments. This feature is particularly useful for monitoring printing costs and ensuring efficient resource usage. Follow this step-by-step guide to enable Kyocera Job Accounting:
Step 1: Access the Device’s Web Interface
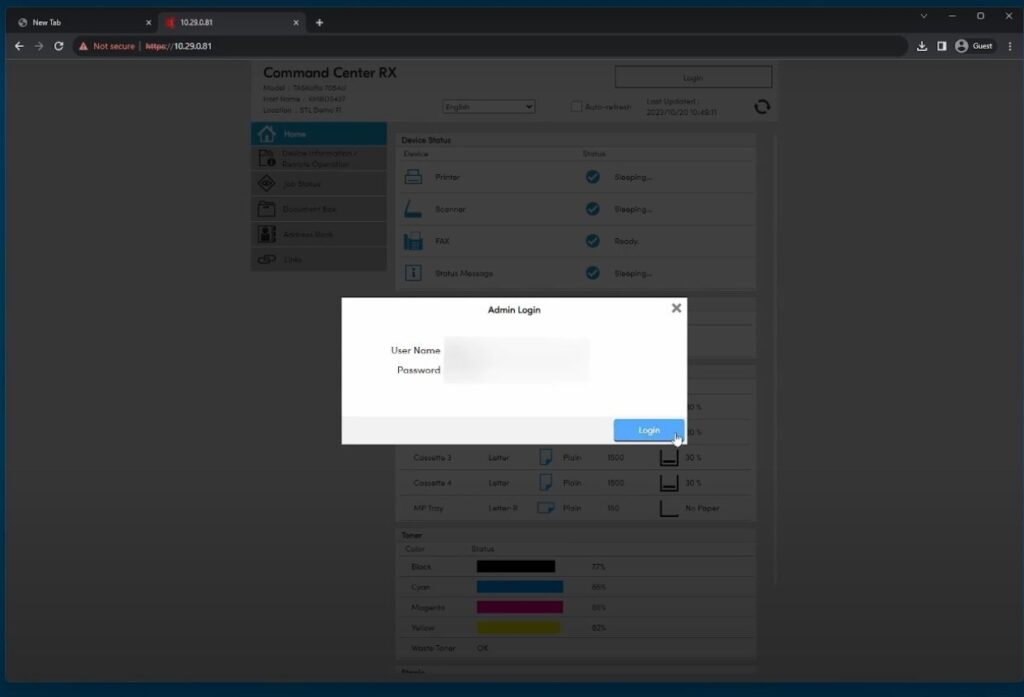
First, obtain the IP address to access the Kyocera device’s web interface. You can usually find this by printing a status page or checking the network settings on the device’s control panel. Next, open a web browser on your computer and enter the device’s IP address in the address bar. Hit Enter to load the web interface.
Next, log in using the default credentials, which are usually “Admin” for both the username and password. If these have been updated, enter your new credentials. For our customers, feel free to call us at 702-979-5002 for assistance with your login details. Please avoid changing the password; if it’s changed and forgotten, a password reset fee will apply.
Step 2: Navigate to Job Accounting Settings
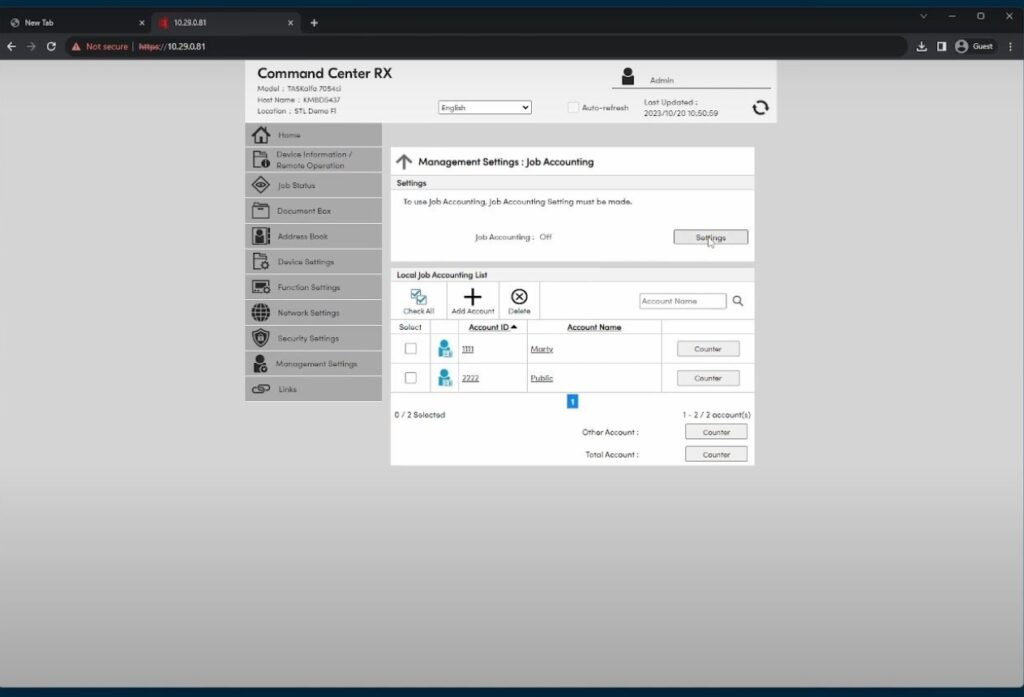
After logging in, navigate to the “System” or “Management Settings” section, depending on your device model. From there, locate and select “Job Accounting.” Here, you’ll find the options to enable and configure the Job Accounting feature.
Step 3: Enable Job Accounting
Now, activate Job Accounting by finding and selecting the “Enable” or “Activate” option in the Job Accounting settings. Once you turn on the feature, you can create or manage Job Account Codes. These codes help you track print activities assigned to users or departments. If you need new codes, enter an Account Name and Account ID.
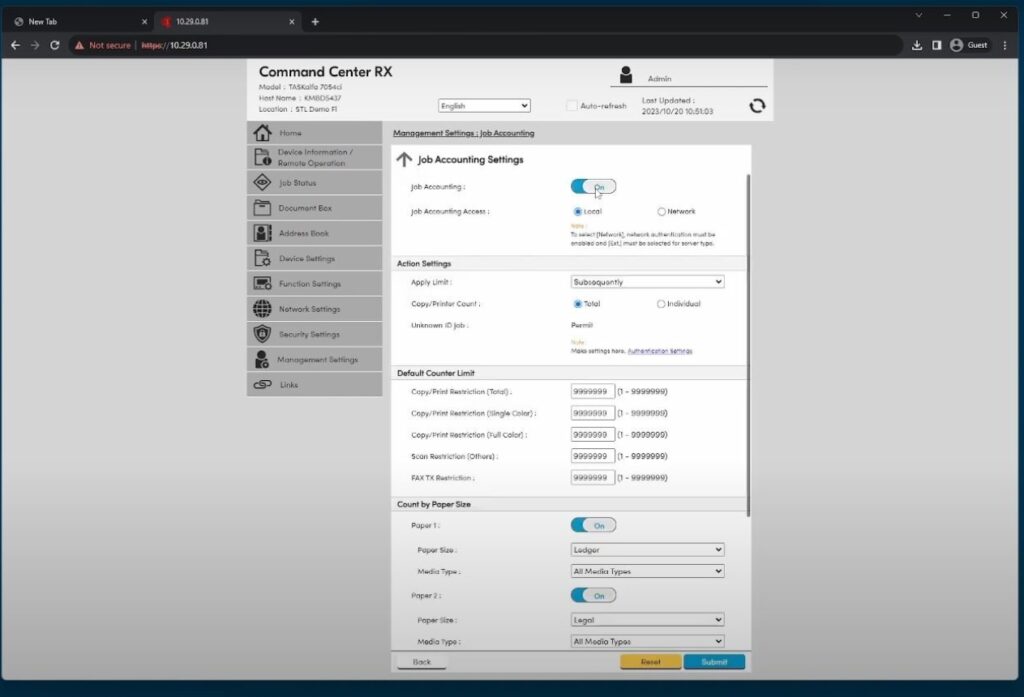
Additionally, you can set restrictions, like limits on the number of prints or copies. For existing codes, assign them to users or groups as needed. Also, configure how users authenticate—either by prompting for an account code with every print job or by setting up default codes for specific users or departments. Finally, click “Apply” or “Save” to enable Job Accounting on the device.
Step 4: Configure Printer Drivers
To ensure the Job Accounting feature works correctly across all users, you may need to configure the printer driver on individual PCs. Start by accessing “Devices and Printers” on each PC, right-clicking on the Kyocera printer, and selecting “Printer Properties.”
Then, in the properties window, navigate to the “Advanced” tab and select “Printing Defaults.” Ensure Job Accounting is enabled in this section. You can set a default account code or require users to enter a code each time they print. Don’t forget to apply the changes to the printer driver.
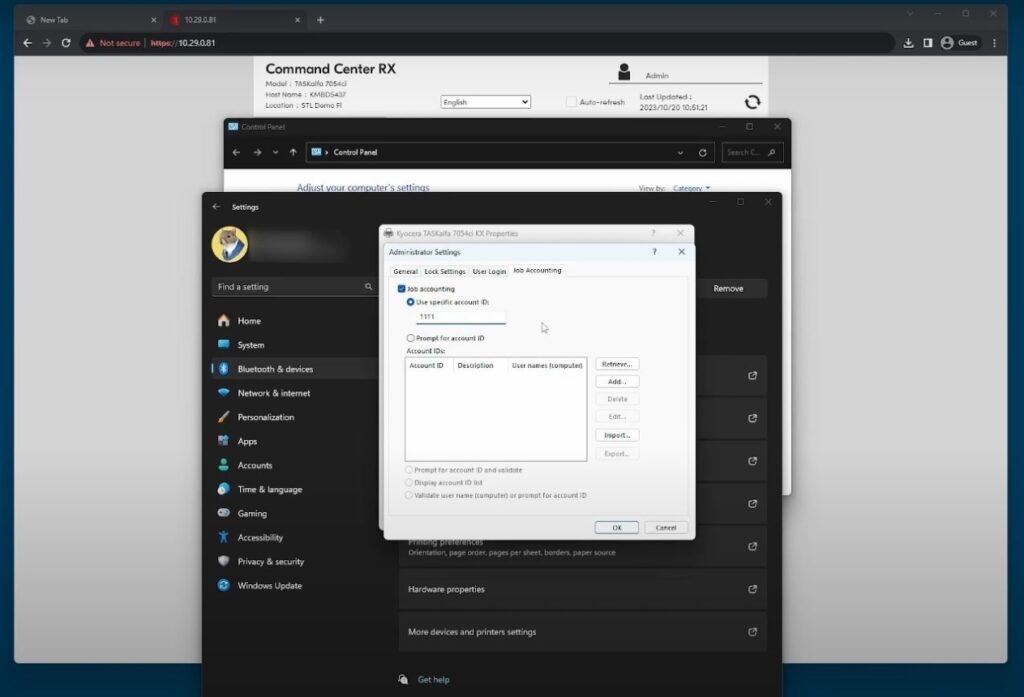
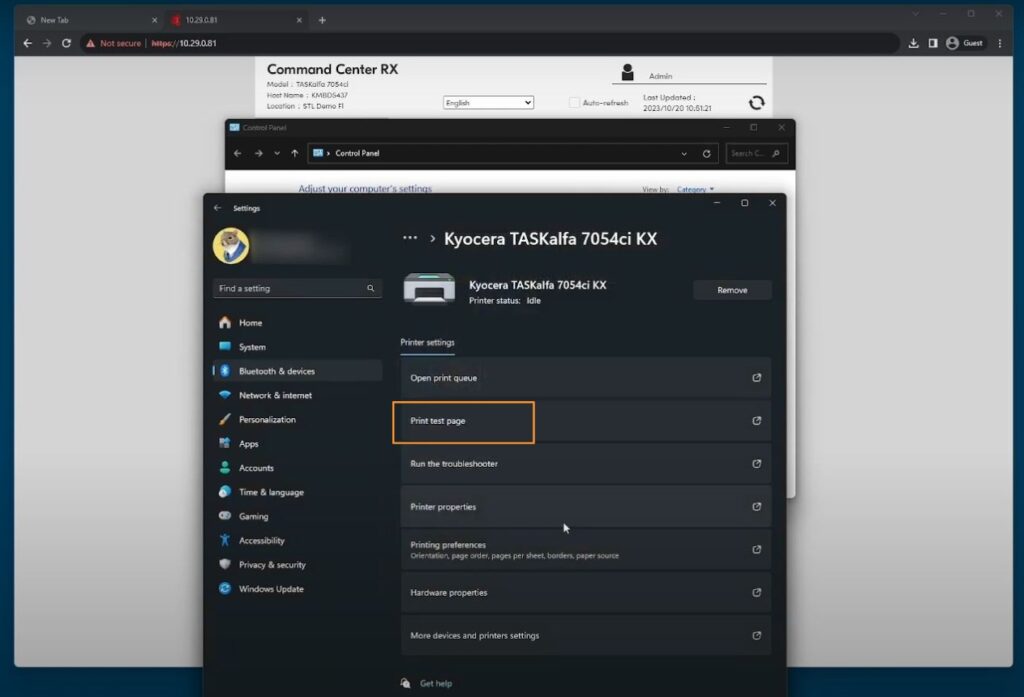
For Windows 11 users, navigate to “Device Setting” tab and select “Administrator Settings.” Click the “Job Accounting” tab and enable the feature. Here, you can also set a default account code or prompt for an account ID every time each time they print. Make sure to add the account IDs that can print on the specific Kyocera device.
Step 5: Testing and Verification
Finally, test the setup by printing a test job from a PC. The printer should prompt for an account code or use the default code you assigned. After printing, verify the job in the device’s job accounting log, accessible from the web interface or control panel.
Check that the job records under the correct account.
Conclusion
Enabling Job Accounting on a Kyocera copier is a straightforward process that significantly enhances your ability to manage and monitor print activities within your organization. By following these steps, you ensure accurate tracking of all print jobs, helping you manage resources effectively and control printing costs.
You can also check these two articles related to setting up your Kyocera’s Job Accounting feature: