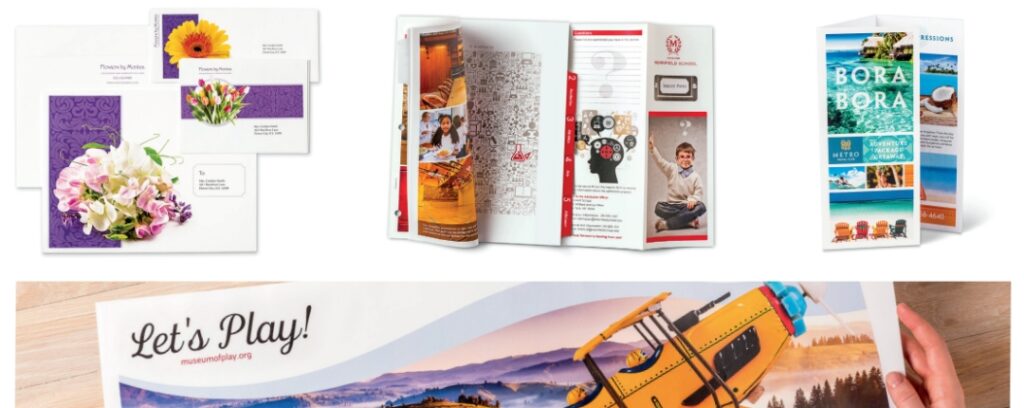
Full bleed printing can elevate your printed materials by providing a professional, edge-to-edge look. Whether you’re working on brochures, business cards, or posters, designing for full bleed is essential to avoid unwanted white margins and achieve a polished final product.
However, many people don’t realize that even the most advanced printers, including large industrial ones used in professional print shops, cannot print edge-to-edge. Every printer leaves a small white margin that must be trimmed off to create a full bleed effect. This article will walk you through how to properly design for full bleed printing and ensure your printed materials look flawless.
What Is Full Bleed Printing?
Full bleed printing means your design or image extends all the way to the edges of the paper with no white borders. To achieve this, your design must be printed on a paper size larger than the final desired size. The excess areas, known as bleeds, are trimmed off after printing to leave a clean, borderless appearance. This process is essential for creating materials like brochures, flyers, posters, and business cards that look polished and professional.

Why No Printer Can Print Without Margins
It’s important to understand that no printer—whether a desktop inkjet or an industrial press—can print edge-to-edge without leaving a small white margin. Even the advanced printers used in professional print shops are designed with this limitation. Therefore, the only way to achieve a true full bleed is by printing on larger sheets and trimming the excess paper. This process ensures that your design reaches the very edge of the final printed piece.
Key Steps to Designing for Full Bleed Printing
To properly design for full bleed, you need to take specific steps during the design process. Here’s how:
1. Add Bleeds to Your Design
When setting up your document, it’s critical to include bleeds. Bleeds are the areas outside the actual print dimensions that will be trimmed off after printing. As a rule of thumb, you should add a bleed of 0.125 inches (⅛ inch) on all sides of your design. For example, if you’re designing an 8.5”x11” flyer, your file size should be 8.75”x11.25” to account for the trimming process.
2. Ensure Important Content Is Within the Safe Zone
While adding bleeds is important, equally critical is keeping essential content, such as text or key design elements, within a “safe zone” at least 0.25 inches (¼ inch) from the edge of the final trim size. This ensures that nothing vital will be cut off during the trimming process. For example, in an 8.5”x11” design, your safe zone would be an area of 8”x10.5” inside the trimmed area.
3. Use the Correct Paper Size
For full bleed printing, your design must be printed on a paper size larger than the final product. If you’re designing for an 8.5”x11” sheet, you might print on 11”x17” or 12”x18” paper. The extra space will accommodate the bleeds, and once the trimming is done, you’ll have a perfectly sized, edge-to-edge print.
4. Design at the Correct Resolution
Ensure that your file is created at a resolution of at least 300 dpi (dots per inch) for sharp, high-quality printing. Low-resolution images can result in blurry prints, especially when the paper is cut down to size.
How Professional Print Shops Handle Full Bleed Printing
Professional print shops use large, industrial presses to print full bleed designs. These printers can handle larger paper sizes and are capable of producing full bleed prints more efficiently than a desktop printer. Once the sheets are printed, they are sent to a guillotine cutter that can cut through hundreds of sheets at once, trimming off the white margins to leave a clean, edge-to-edge design.
For businesses that regularly need full bleed prints, investing in light production printers like the Xerox C60 or Xerox Versant production printers is a smart choice. These printers offer the flexibility and quality of professional print shops, allowing you to print on larger sheets and use finishing tools to achieve full bleed results.

Light Production Printers for Full Bleed Printing
If you want to achieve print shop-quality full bleed prints in-house, consider light production printers like the Xerox C60 or Xerox Versant series (Xerox Versant 80, Xerox Versant 180, Xerox Versant 280, Xerox Versant 2100, and Xerox Versant 3100). These printers are designed for high-quality, high-volume printing and can handle larger paper sizes, making them ideal for full bleed designs. When equipped with a finisher and a square-fold trimmer, these printers can print, trim, and fold your materials to the exact size and specifications you need.
Benefits of Light Production Printers:
- Efficiency: Print large volumes with consistent quality and professional finishing.
- Precision: Trimming tools like the square-fold trimmer ensure perfect edges every time.
- Flexibility: Handle a variety of paper sizes and materials, allowing for full bleed printing on large-format sheets.
With the right setup, you can produce high-quality, full bleed prints without having to outsource your jobs to a print shop.
Final Thoughts: How to Choose the Right Printing Solution
When it comes to full bleed printing, the method you choose depends on your needs. For small projects, following the steps outlined in this article will allow you to achieve full bleed results with a standard printer and some manual trimming. However, if your business regularly requires full bleed materials, investing in light production printers like the Xerox C60 or Xerox Versant series will save you time and give you professional-grade results.
At Tangerine Office Machines, we offer a range of light production printers and finishers that can help you achieve full bleed printing with ease. If you have any questions about choosing the right printer or need guidance on your next full bleed project, call us at 702-820-4029. Our team is here to help you find the perfect solution for your printing needs

