
Kyocera multifunction printers (MFPs) are renowned for their efficiency and reliability in meeting the diverse needs of modern workplaces. One key aspect of maximizing their utility is ensuring they are seamlessly integrated into your network infrastructure. Whether you’re setting up a new device or adjusting settings for an existing one, understanding how to navigate and modify network settings directly from the control panel can be immensely beneficial. In this guide, we’ll walk you through the steps to edit your Kyocera MFP network settings from the control panel.
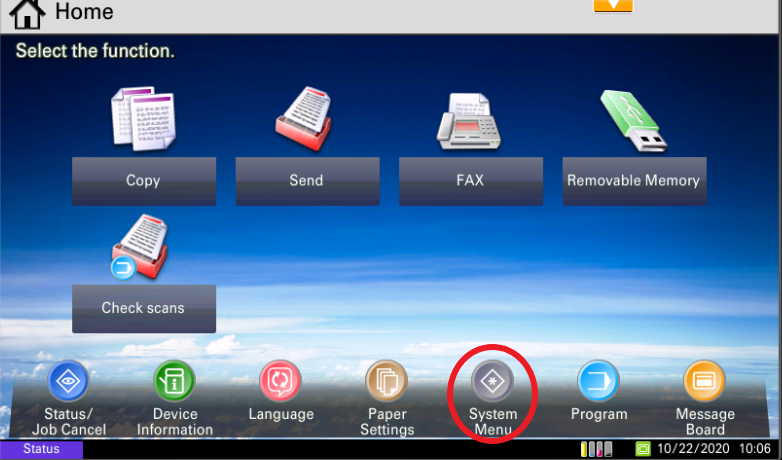
1 – Accessing the Network Settings Menu:
Firstly, ensure your Kyocera MFP is powered on and ready. Navigate to the control panel, typically located on the front face of the device. Here, you’ll find a series of buttons or a touchscreen interface. Look for the “Menu” button and press it to access the main menu.
Once in the main menu, locate the “System Settings” or “System Menu” option. Depending on the model of your Kyocera MFP, the exact wording may vary slightly. Select this option to proceed.
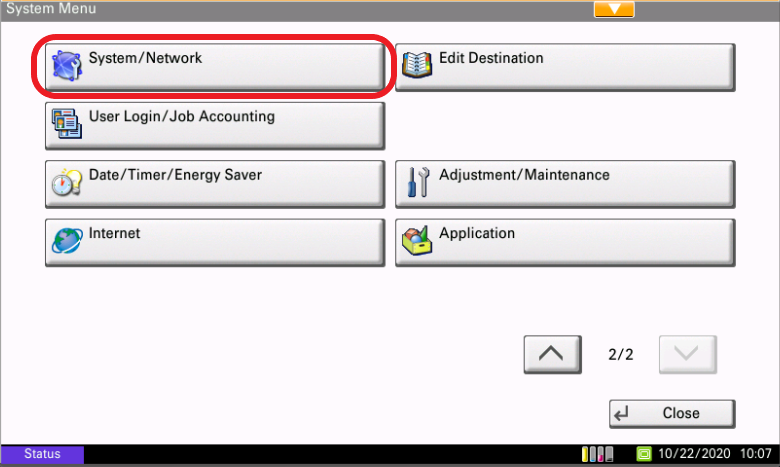
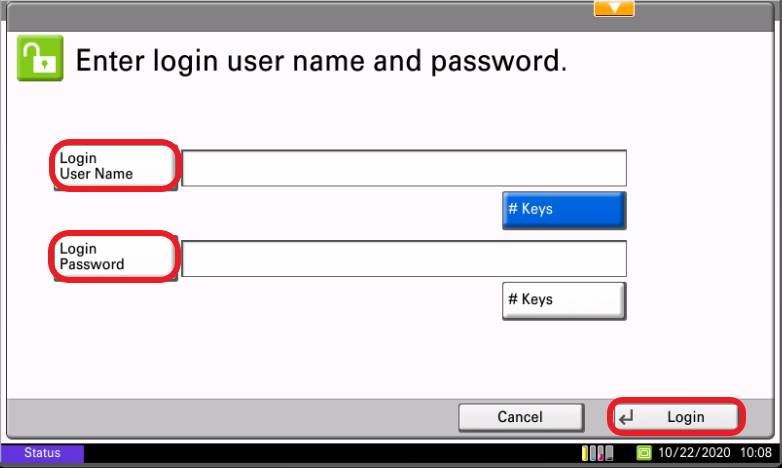
Within the settings menu, search for the”System/Network” option. You may then be asked to login your user/admin credentials.
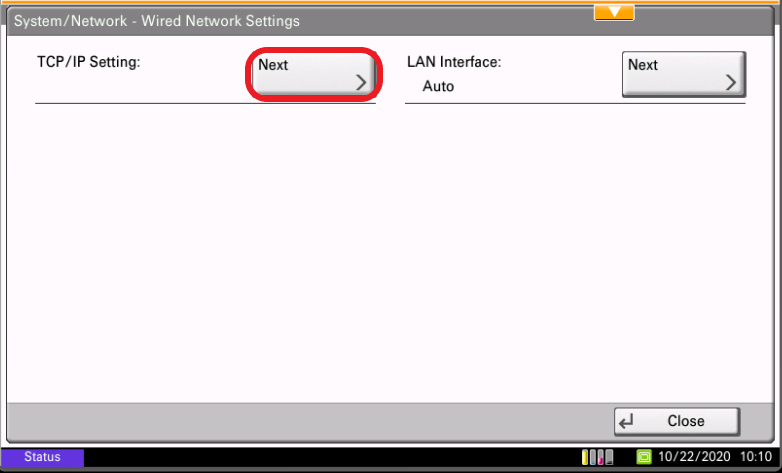
Once done, click on the “Network” button, then press “Wired Network.”
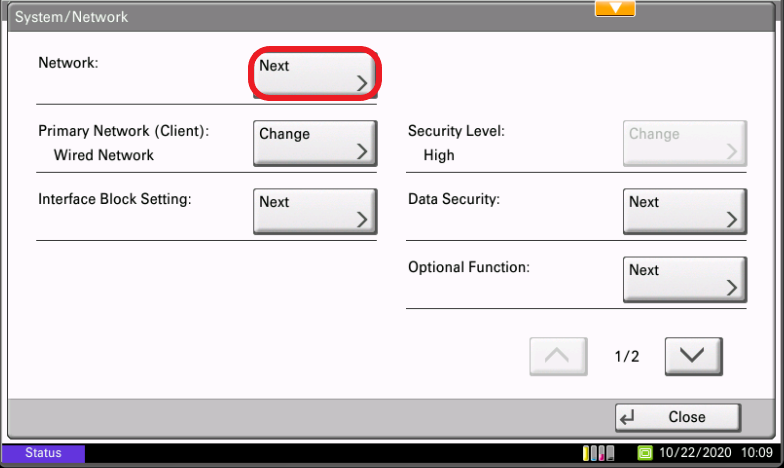
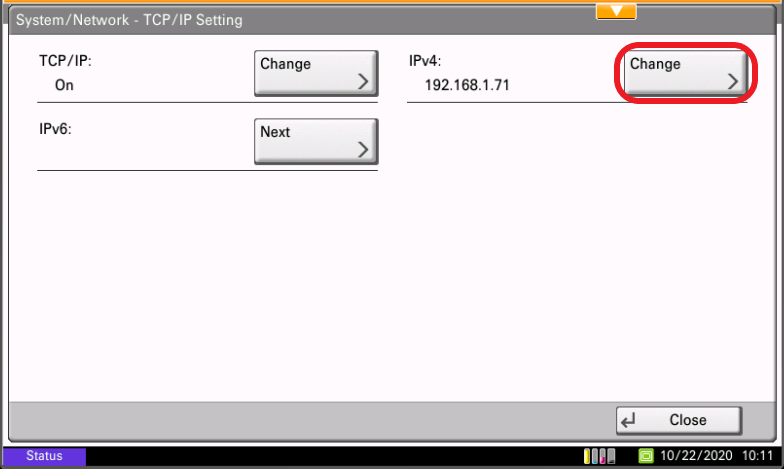
Select “TCP/IP Settings” button, then the “IPv4” button to change the network settings.
2 – Modifying Network Settings:
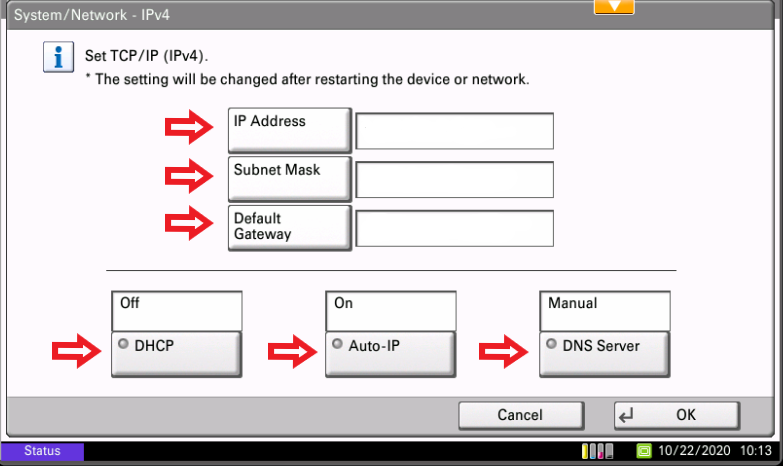
Upon entering the IPv4 settings menu, you’ll encounter various parameters that can be adjusted to tailor the MFP to your network environment. These may include:
- IP Address
- Subnet Mask
- Default Gateway
- DHCP (Toggle On/Off)
- Auto-IP (Toggle On/Off)
- DNS Server

3 – Saving Changes
Once you’ve made the necessary modifications to the network settings, ensure to save your changes before exiting the menu. Look for an option typically labeled “Save” or “Ok” to confirm and implement the adjustments.
After saving the changes, it’s advisable to perform a network test to ensure the MFP is successfully connected and able to communicate with other devices on the network. This can usually be done from the same network settings menu or through a separate diagnostic tool on the control panel.
4 – Troubleshooting:
In case you encounter any issues during the configuration process or after applying changes, Kyocera MFPs often provide built-in troubleshooting tools to diagnose network connectivity issues. These tools may include ping tests, network status checks, or log viewing capabilities to identify and address any underlying issues.
Additionally, referring to the user manual or contacting Kyocera technical support can provide further assistance in troubleshooting network-related problems.
Conclusion
To edit your Kyocera MFP network settings from the control panel is a straightforward process that allows you to tailor the device to your specific network environment. By following the steps outlined above, you can ensure seamless integration and optimal performance of your Kyocera MFP within your network infrastructure. Whether configuring IP addresses, DNS settings, or wireless connectivity, leveraging the control panel interface empowers users to efficiently manage their MFP’s network settings with ease.
Image Source:
Boston Document System