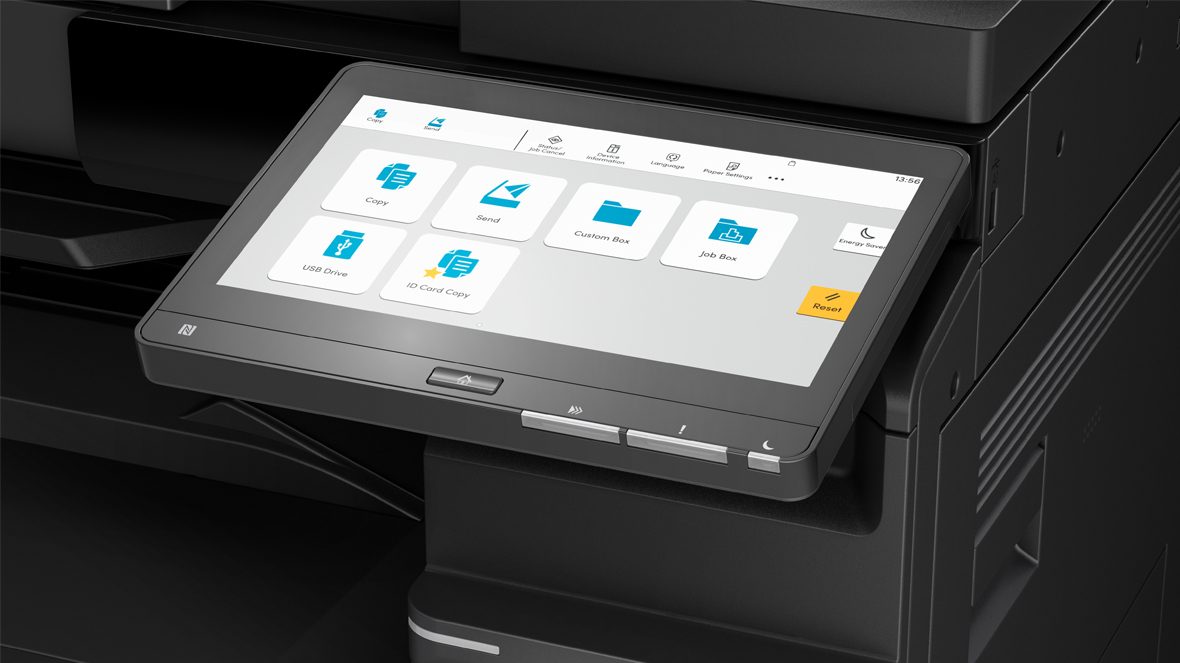
In today’s interconnected world, knowing how to locate the IP address of your office equipment is essential for managing network configurations and troubleshooting connectivity issues. Among the multitude of office devices, printers hold a critical position, and the Kyocera TASKalfa series, including models 4054ci, 5054ci, 6054ci, and 7054ci, is renowned for its efficiency and reliability. This guide aims to walk you through the process of finding the IP address on Kyocera TASKalfa **54ci models, ensuring seamless integration into your network infrastructure.
Understanding the Importance of the IP Address
Before delving into the specifics of finding the IP address on Kyocera TASKalfa devices, it’s crucial to understand the significance of this alphanumeric label within a network context. An IP address serves as a unique identifier assigned to each device connected to a network, allowing for communication and data exchange. Whether it’s for configuring print settings, establishing connections, or diagnosing network issues, knowing the IP address of your printer is fundamental.
Step-by-Step Guide to Finding the IP Address
Step 1 – Accessing the Device’s Control Panel
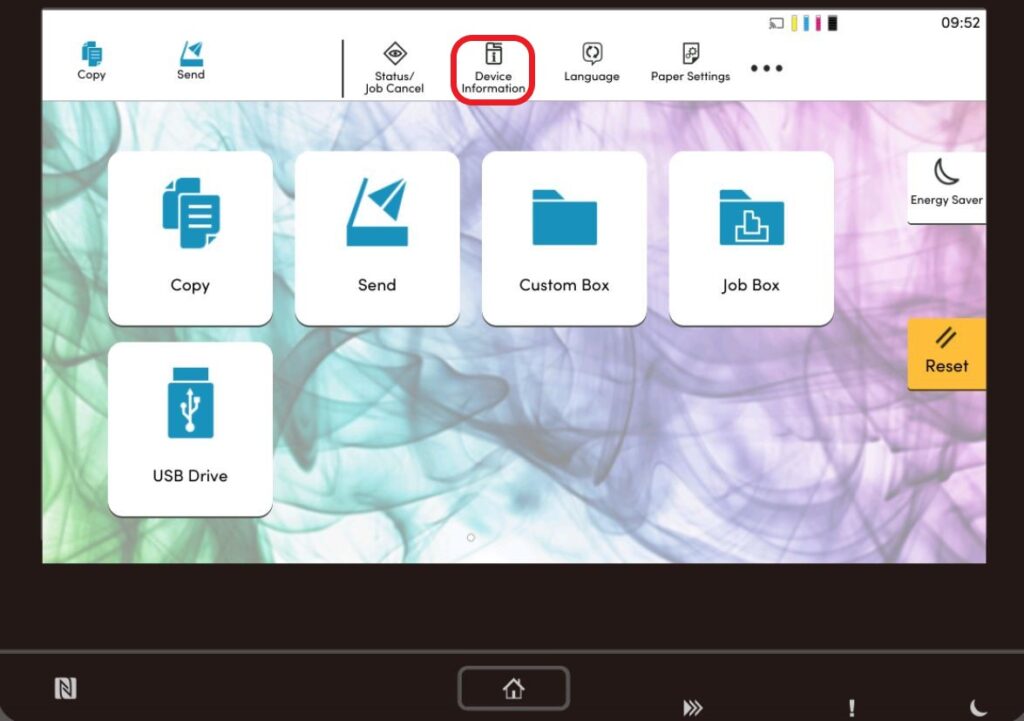
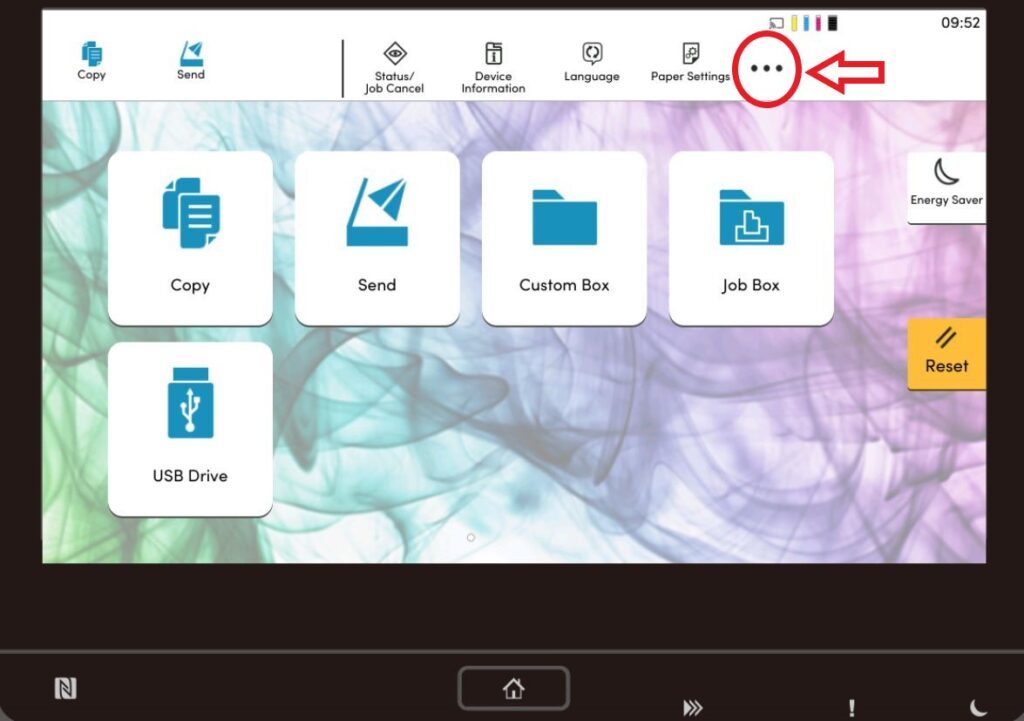
Begin by navigating to the control panel of your Kyocera TASKalfa printer. This usually involves pressing the designated “Menu” or “Settings” button on the device.
Step 2 – Selecting “Counter”
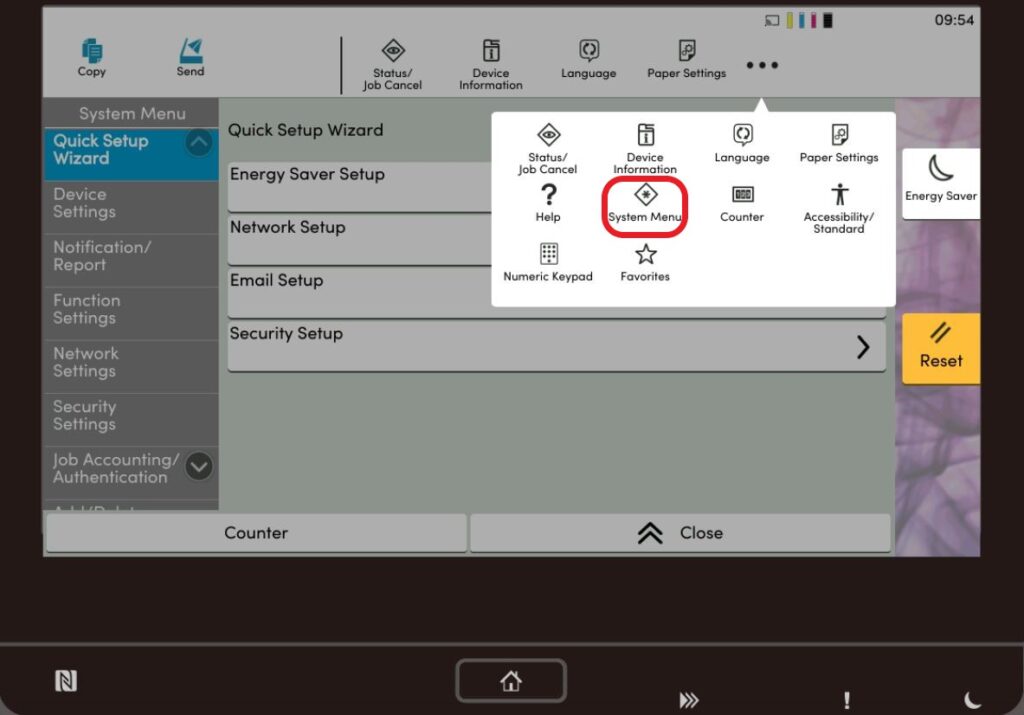
Once you’ve accessed the control panel, locate and select the “Counter” option. This menu serves as a gateway to various settings and information about the device.
Step 3 – Navigating to “Print Reports”
Within the “Counter” menu, you’ll find the “Print Reports” option. Select it to proceed further.
Step 4 – Choosing “Printer Status Page”
Under the “Print Reports” submenu, look for the “Printer Status Page” option. This is where you’ll find detailed information about the printer, including its IP address.
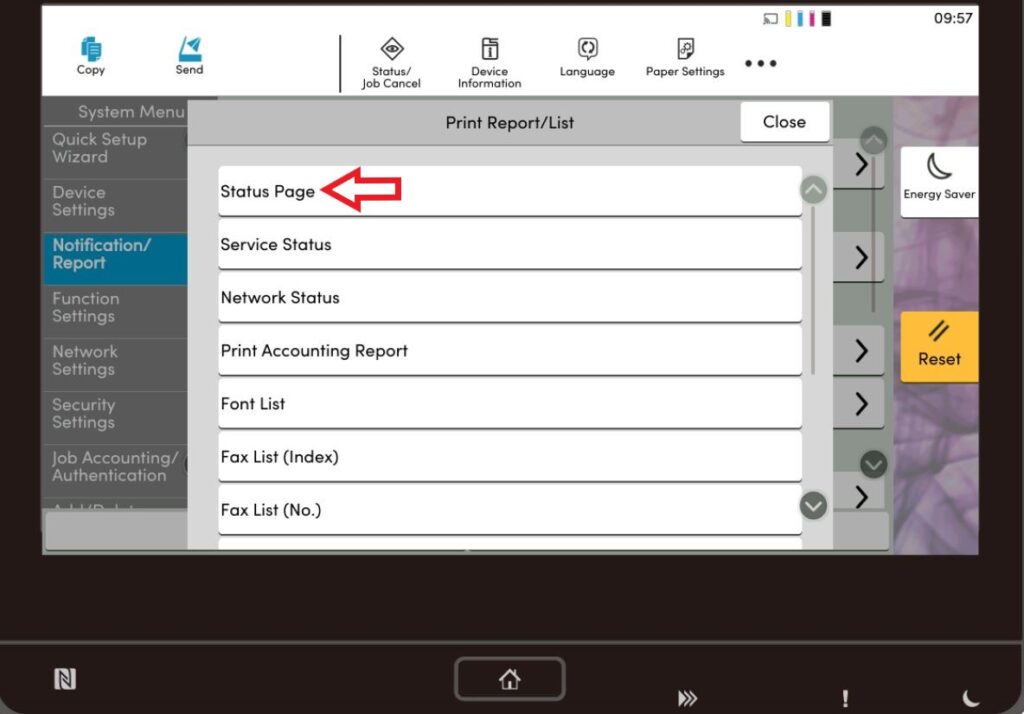
Step 5 – Locating the IP Address
Upon selecting the “Printer Status Page,” the device will generate a report containing pertinent details, such as the IP address, subnet mask, and other network-related information. The IP address is typically displayed prominently within this report.
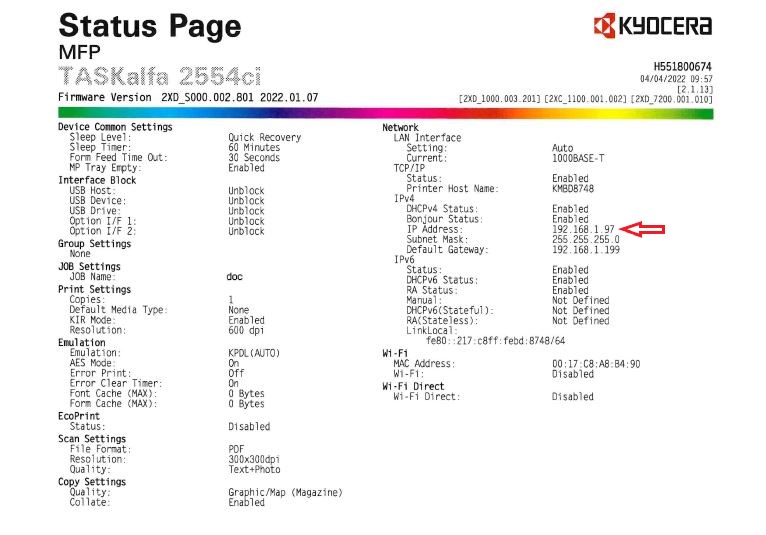
Step 6 – Note and Utilize the IP Address
Take note of the IP address displayed on the status page. You can then use this information for various purposes, such as configuring network settings, adding the printer to your computer or mobile devices, or troubleshooting connectivity issues.
Additional Tips and Considerations
Static vs. Dynamic IP Address
While the IP address displayed on the status page is typically assigned dynamically by a DHCP server, you may opt to configure a static IP address for the printer to ensure consistency and easier management within your network.
Network Configuration
Ensure that your Kyocera TASKalfa printer is connected to the same network as the devices you intend to print from. Verify network settings and troubleshoot any connectivity issues that may arise.
Regular Maintenance
Periodically check the IP address of your printer, especially if your network undergoes changes or if you encounter connectivity issues. Keeping this information up-to-date facilitates smooth operation and efficient troubleshooting.
Conclusion
In conclusion, locating the IP address on Kyocera TASKalfa 4054ci/5054ci/6054ci/7054ci printers is a straightforward process that involves navigating through the device’s control panel to access the printer status page.
By following the steps outlined in this guide, you can quickly retrieve the IP address and leverage it for configuring network settings, establishing connections, and resolving connectivity issues. This knowledge empowers you to effectively integrate your Kyocera TASKalfa printer into your network infrastructure, ensuring optimal performance and productivity.
Image Sources:
Boston Document System

